Thursday, August 23, 2007

hairy legs!

I really should have gotten progress photos of the fur being applied. Damn.
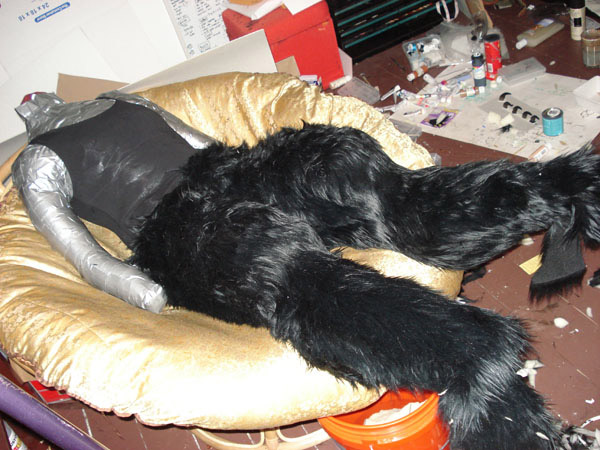
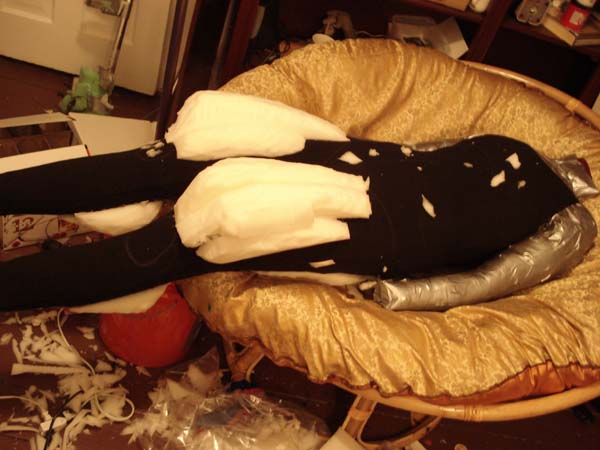
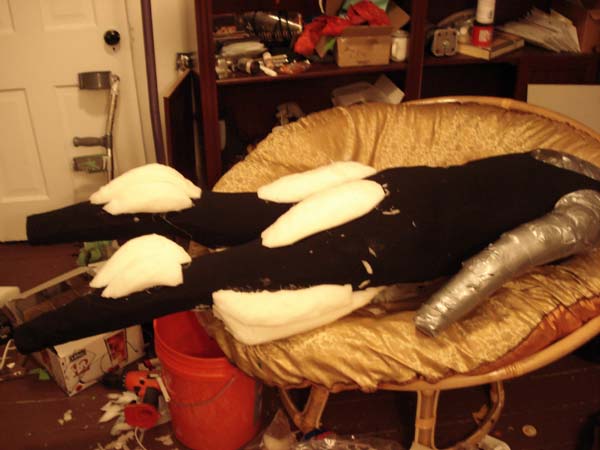
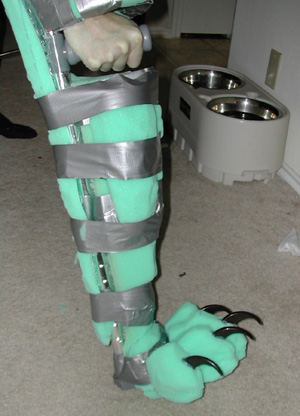
What I did was glue on the fur piece by piece. Alot of costumers sew the entire suit in just a few pieces but im just not that good with a sewing machine. I used hot glue and a box cutter. I started at the bottom and worked my way up to the waist, paying attention to the way the fur lays. This fur has a decent length so it's pretty forgiving of imperfections. I havent gotten photos of me wearing the legs though I did try them on..they look great and will look even better once the proportions are evened out with the heeled shoes im building for this. I think the foam at the top of the legs is a little thick but then again iam trying to make a large semi bulky werewolf. The torso and shoulder foam should help even out my fat lycanthrope thighs....if not i may rip off the fur and trim the foam a little.

once everything is in place I will sew all of the glued edges together to make it more sturdy and conceal any seams!

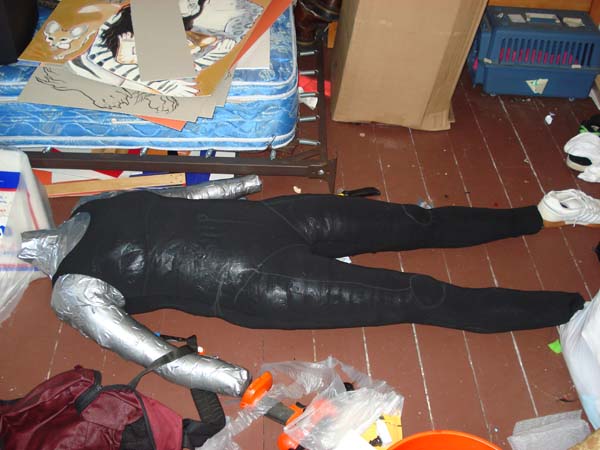
Next: Torso and arms!

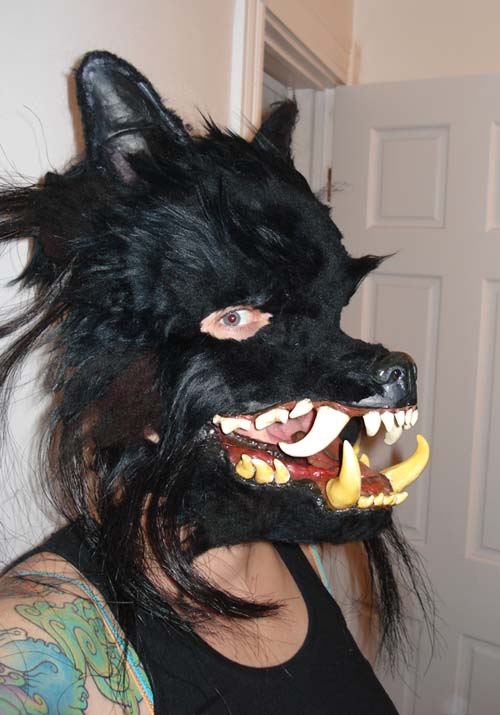
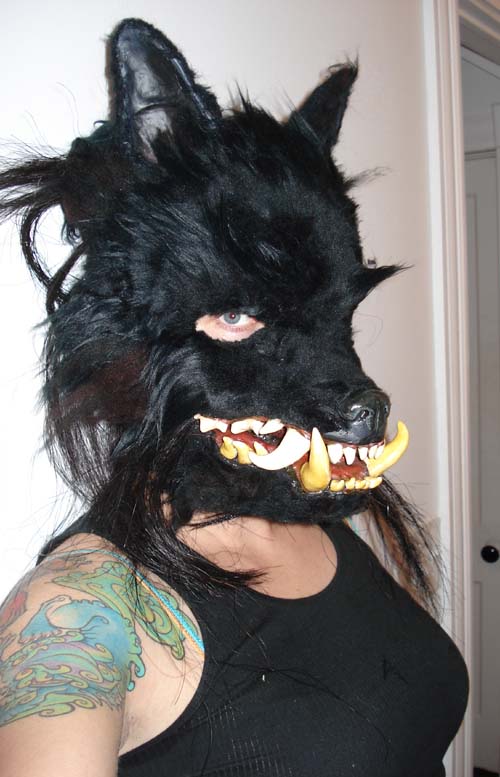
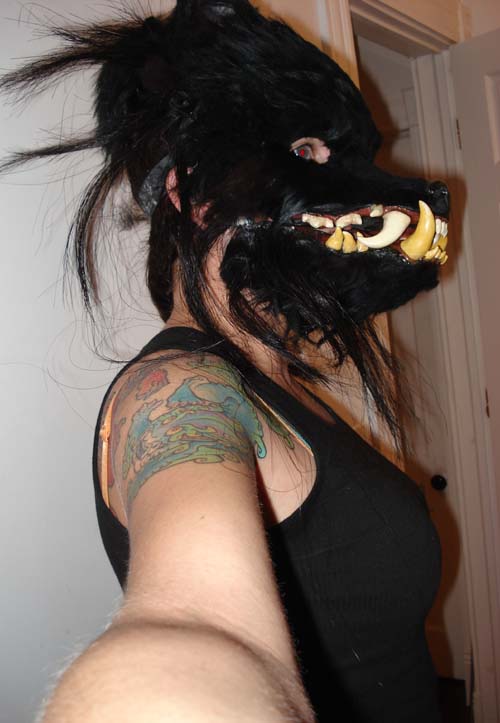
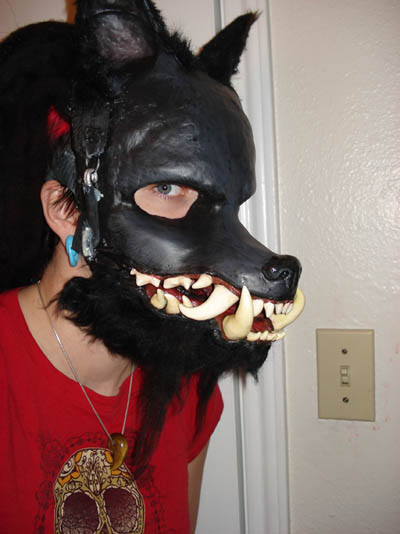
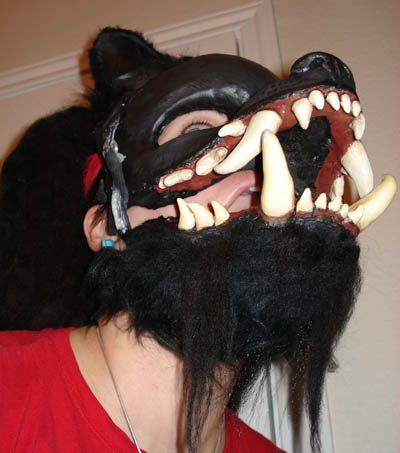
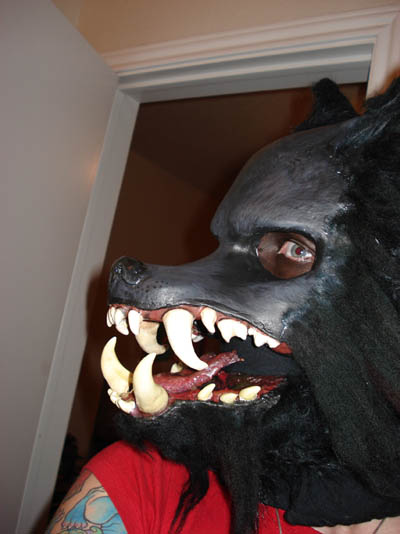
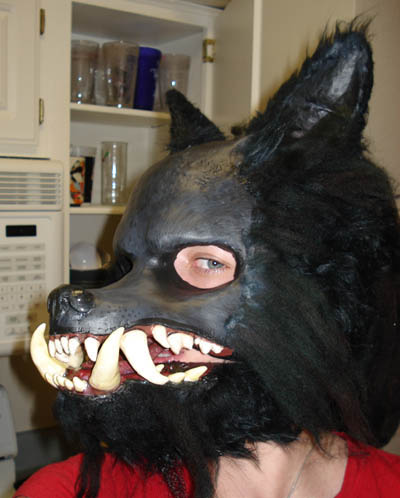
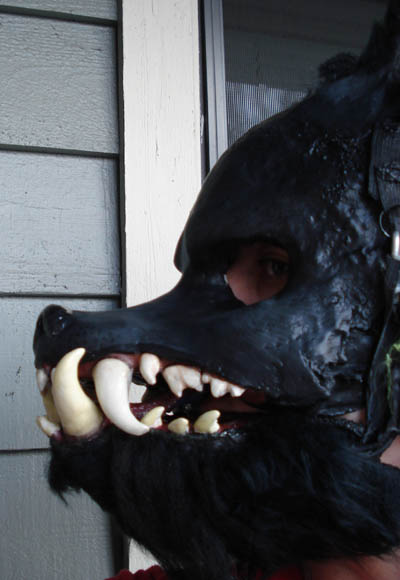
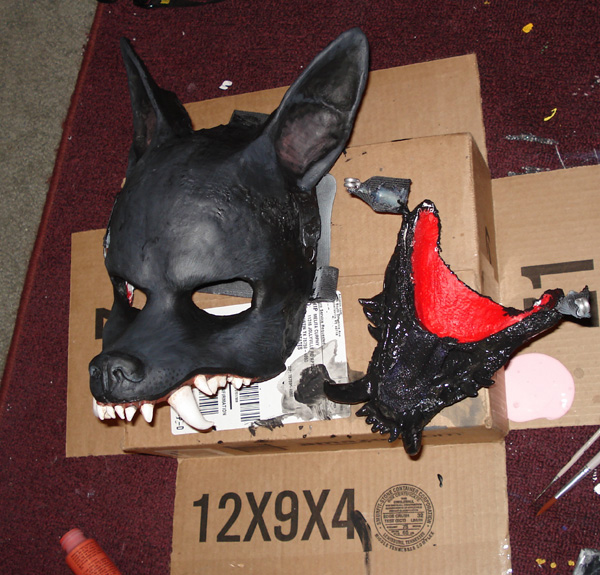
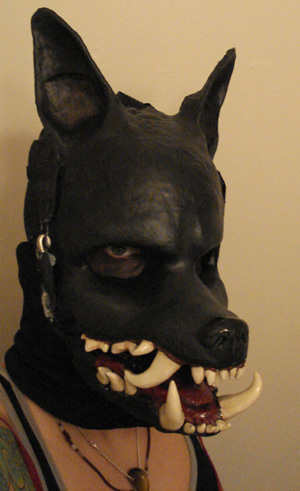
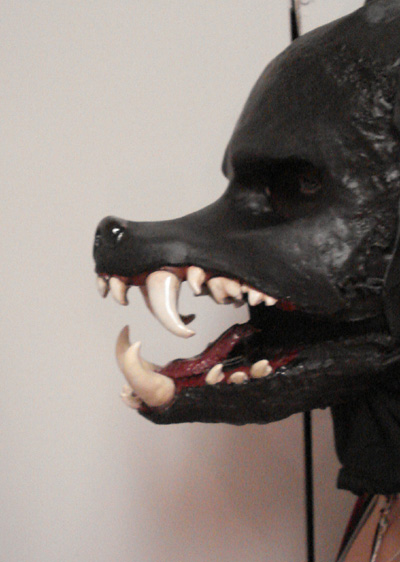
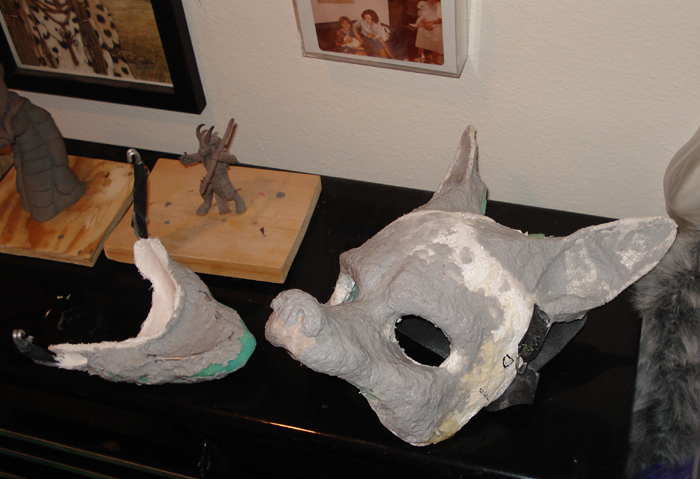
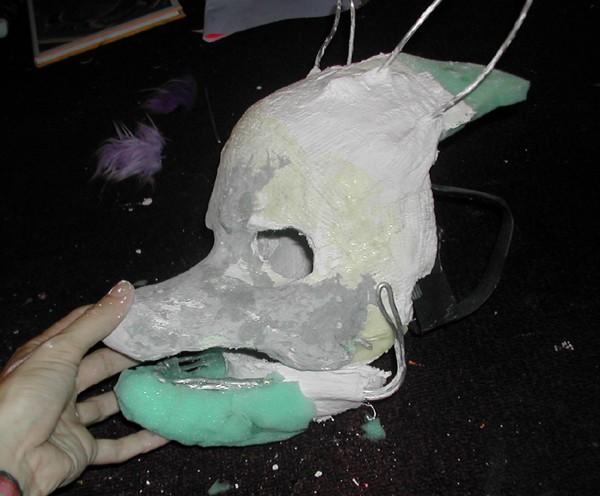
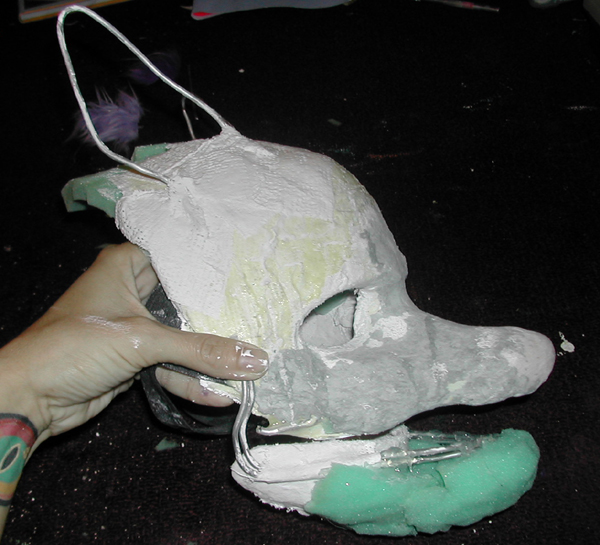
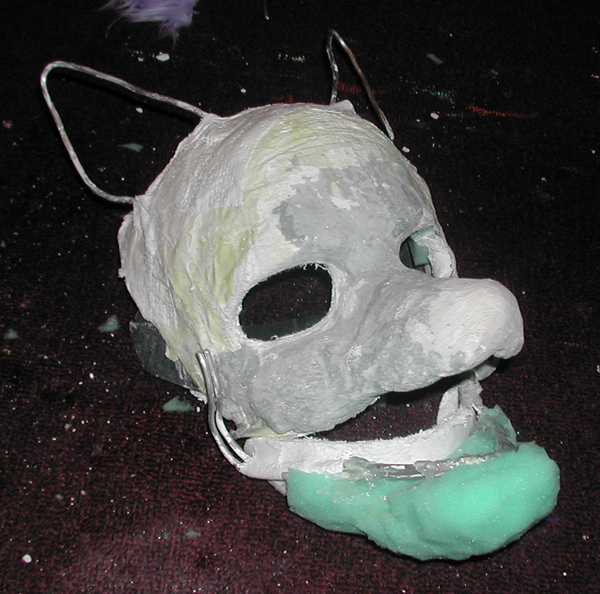
As usual please click for the full photo!

i left a length of fur hanging off the end of the legs..this will attach to the shoes/feet later on...

fur legs

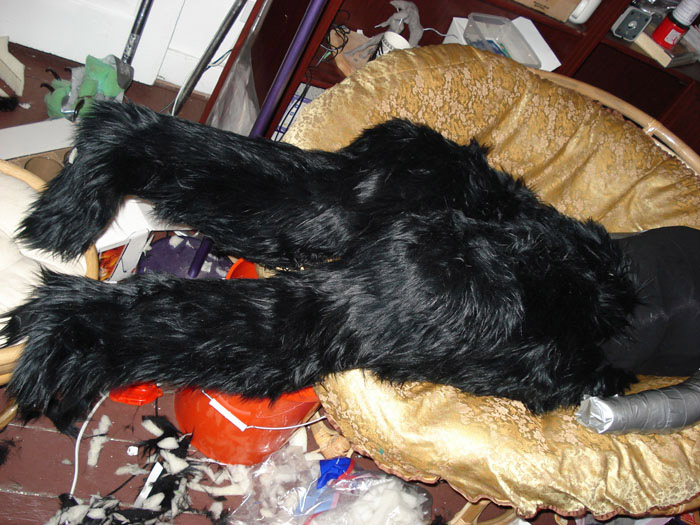
You can see the crutch from my abandoned four legged idea...
furlegs3

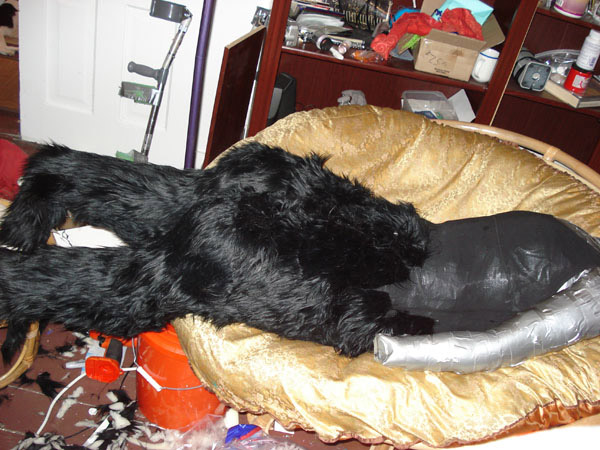
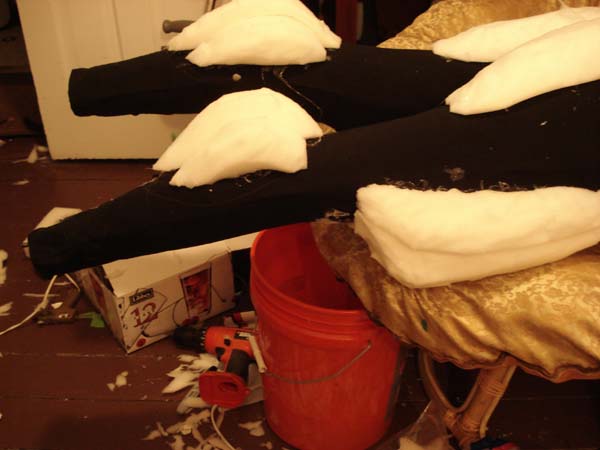
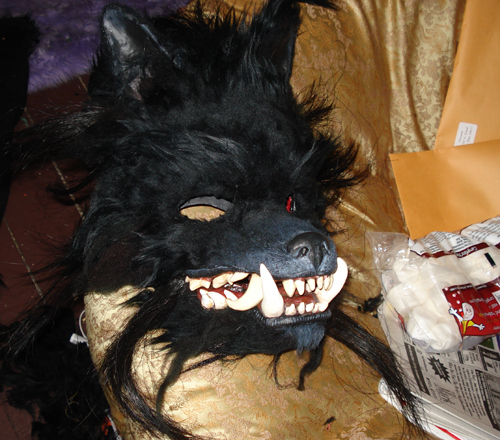
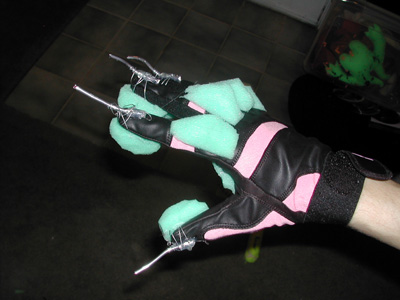
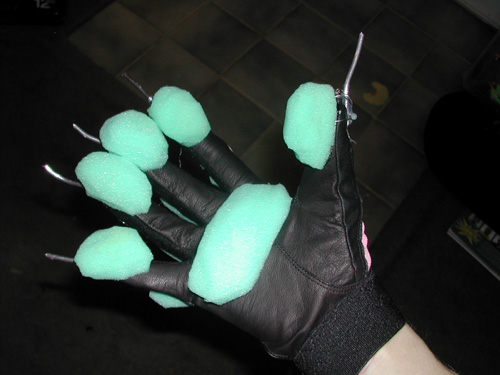
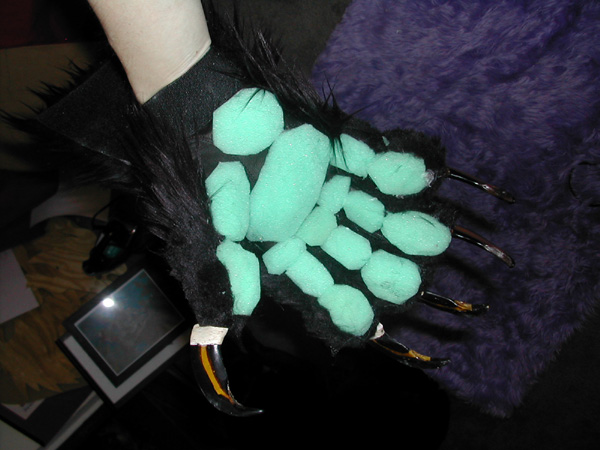
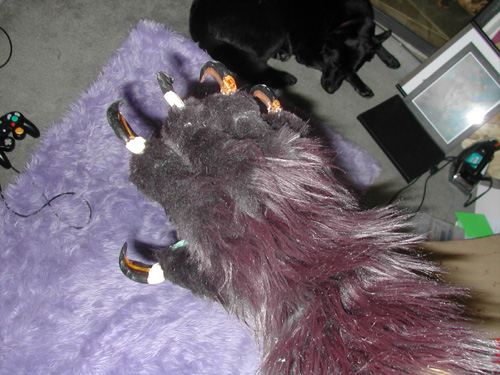
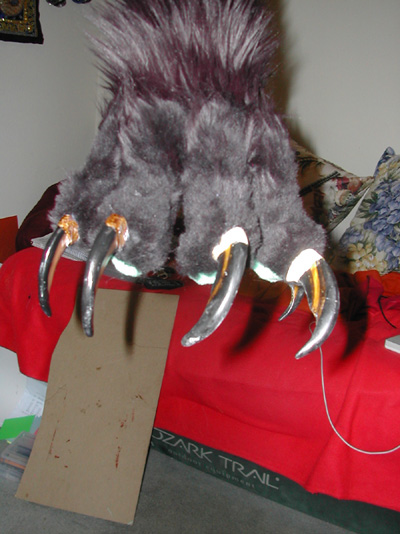
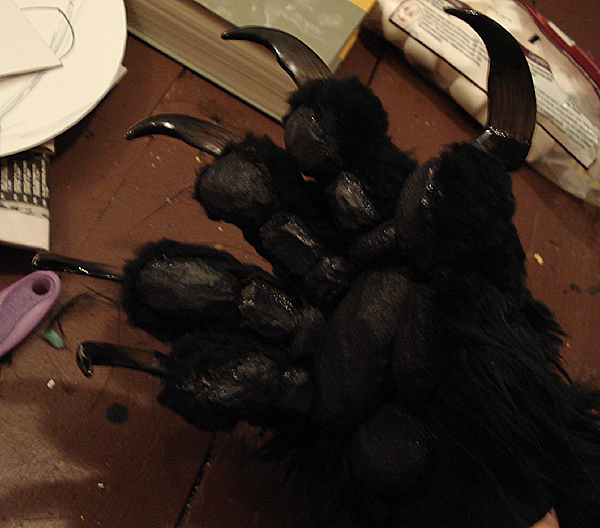
Check out my messy work room! Claws are being varnished in the background...

fur legs2

Monday, August 13, 2007

Duct tape dummy

Made the duct tape dummy with the help of my boyfreind last week! It didnt take long and is much cheaper than buying a clothes dummy. You just put on a long sleeved shirt and some pants, wrap in duct tape ( not TOO tight but snug), then carefully cut yourself out with medical scissors. Reattach the duct tape skin and stuff it! Presto, cheap dummy. I found several tutorials online but this one is the best:

http://www.fursuit.org/wiki/doku.php?id=fursuit:patterns:duct_tape_dummies:diadexxus

I have been told this is also a great way to create patterns too!


So here it is! I'm actually not quite this uh...bloated in real life. No, really! ;) Please click on the photos to see the entire thing.

body

Adding foam! It's not done, still needs evening out and whatnot. The foam will create the illusion of having dog like legs....

body2
body3
body4

Next up: fur and foaming the torso! It's going to have a deep canine ribcage and a nice thick hunched back. Fun!

Thursday, August 2, 2007

Head almost done!

Furred the rest of the head. You can see I decided to just use regular faux fur for the whole thing. It actually doesnt look as flat and cartoony as I thought. The bottom teeth have turned yellow and will be fixed...

fur head

Creepy werewolf with boobies....
fur head


Hurrr Myspace...
fur head3

Brushed in some grey in the muzzle! The teeth look super bright in this photo, it's the flash's fault you can't see my nice tooth paint job :( Ignore the marshmallows, i was making indoor s'mores..
fur head4

The head still needs work, but the body suit needs to be started before I can really do anything else. The body suit will have a thick neck that will attach to the head.


Nexxt: Duct tape dummy and foam body suit!

let's make some paws!

Okay so my original idea was to make this thing quadrupedal. I even bought arm braces and started to build up the foam and paws:
paw

But the more I costumed in the demon I realized how tiring and hard on my body it was just being on two legs. I'd like to be able to be in this suit for a few hours with minimal breaks... and four legs would make that impossible. I have a messed up lower back, bird wrists and bad knees. Plus I wouldnt feel all that safe not being able to use my hands. I have had some bad experiences with drunks and assholes in costume, believe it or not and well...this just seemed like it might be inviting disaster. So the idea has been scrapped in favor of safety. Sorry guys.

But I did manage to build some really awesome paws instead!

Foam over a baseball batters glove. The wires will make the claws sturdy on top of my fingers ( the claws will fit over the wire). The foam makes my hand look like it has different stubbier joints and hopefully a little less human.

paw start

Hmm, not there yet.
paw start2

Better! This will be painted black. The claws have been added, the wire is in the middle of them.
paw

The topside of the furred paw. I shaved down the finger tips and let it fade into the long arm fur. The claws are replica grizzly claws that will be painted later on.

The fur is solic black but looks kind of purple with this flash...ergh.
paw3

The business end! Sorry about my ugly apartment, it was basically a studio with a bedroom. My couch was a blowup camping bed with ugly cheap pillows thrown over it.
paw2

The pawpads were painted with acrylics, sealed with rubbber, painted again and sealed with polyurethane.

Someone suggested tool dip and i think I may use that for the left paw pads this time...
done hand3

Claws are painted and sealed and it looks pretty awesome!
done paw

adding fur to the head

Furred the bottom jaw, started the ears....some is just faux fur, some is dyed mohair glued on lock by lock. I glue on the mohair strands using superglue..it's really not fun. At all.

Ading fur

Furry chin!

Chin

Adding some to the sides of the face....
add hair7
addhair 6

add hair3

Coloring the head

Time to paint him! Again, I had thought most of the front face would be naked so I cared way too much about painting it all nice. It's not a total flat black, there's actually a little shading and highlighting. That red stuff in the jaw is tool dip, I figured I'd seal the inner face since it can get pretty nasty in there with all the sweating I'd be doing. Easier to wipe off and makes it a little smoother...


painting the head

I almost pooped myself when I tried it on all black like this. I also have some black eye make up to blend things a little better...

Colored head test

The teeth have been sealed with a glossy clear epoxy. Do a test on your epoxy first, because the brand I used for the bottom teeth yellowed within a month or two and they no longer matched.
The teeth are not a pure white, either..I did stain them a little but I don't feel as though they should be overly yellowed as many photos of predators I have seen actually have pretty white teeth. And I want him to look scary not filthy ;)
So, nyah!

Colored jaw test

I feel really cool and totally nerdy at the same time.
colored head

TEETHS!

oohhhh man, this is where it got fun. The teeth are sculpey which I molded to the jaw, then baked then glued in. I also put a little snarl over them in paper clay.
I also used a ton of primer on this thing while I was obsessing over the smoothness...that's why it's gray.

Adding teeth!

I love me some Furi Kuri!
teethhead5

Excuse me, can I bite your face?


Bitey!

Here's a shot before I baked the teeth. Notice how I marked them so I could glue them in easier later on. I didnt detail the teeth as much as I could have but it works anyway.

head teeth sculpey

Detailed head sculpting...

I added plaster strips to the ears as well as paper clay. Lots of shaving, sanding and swearing later and we kind of have a werewolf on the way....
Sculpting with paper clay sucks. I just did a little, let it dry, sanded, added more...repeat until happy. It's frustrating but it's worth it to me. This paper mache clay is REALLY light and really strong. It takes patience. I'd work on it between other projects so I didnt get too annoyed...

Bring on the detail!

Quicky jaw hinge....

So , uh...try it on! I tried on the head frequently to make sure everything was comfy and fit. You can see my jaw hinge method right there. Not the most high tech but it works fine. the mandible has metal hooks that stretch and fit into a ring glued onto the top head. The elastic allows things to move while staying on your own jaw.

head progress

Pretty goofy. I'm wearing a balaclava hood (like a ninja mask) a head covering used my many costumers. It prevents you from sweating makeup into your eyes and covers your own mouth from view. Burping in one is not fun.

More head....

Now im starting to get excited....

Adding the snout and jaw!

okay so I skipped a few steps, here. I formed a little wire armature for the snout, you can see it running along the sides there, nice and ugly. I then glued it down and glued some foam over the wire armature. Snip the snout down to the shape you want.
I then coated the entire thing with resin to make it super strong!

add snout


Once the resin sets up, begin to build up the meat of the snout with some paper mache clay. I just did the basic shape for now...let it dry , then add details later.
Add clay

Basic snout shape all built up and ready to dry...

add clay 2

Once the clay dried I went and dremeled down alot of the texture. I didnt think I'd be covering the whole thing with fur, my plan was to hand glue hair and then leave most of it smooth...so I really got into smoothing the face which was sort of a waste. Oh well, that's what happens when you make it up as you go along!

head3

I also added wire ears and the jaw. The jaw was also made with plaster strips molded onto my actual chin. A wire serves as the support for the foam mandible, just like with the upper head...

head2

DERP!

head

Okay, let's get started!

The very first step of making a werewolf costume! First, dye your hair pink. Second, put on your best MySpace face.

Three, using plaster strips make a little half mask. Dont forget to lube your face with some lotion!

first step

Half mask is done, start adding some foam to protect your noggin. Nothing too thick, you dont want the wolf to have a huge balloon cranium ( or maybe you do, whatever)

progress7

Foam added, now make a little elastic bit to hold it on.

PS smoking is bad for you.

progress4

Add some strips over the foam to make it more solid...

progress6

Elastic and foam!

progress5

Welcome to my werewolf costume blog!

Well I decided to make a blog that tracks the progress of my newest costume. People had been asking for progress photos, which have been on my website http://missmonster.com/ since I started but it's not easy to find on the site and kinda scattered. This is an easier format to use and link to and will hopefully be a helpful reference for other costumers.

I already have a ton of photos of the progress and will be uploading them this week, each step in a separate entry.

Just a word of warning! I made this shit up. My methods might be wierd or back asswards or unprofessional. I do what works for me , in my budget. If I could afford/had the space for a silicon head with hand punched hair or top of the line custom dyed fur I would. There are people out there like http://runningwolfpack.com/ who are masters of this stuff and use high quality pro methods! Check them out too!

But for now it's just redneck jimmy rigged methods that im actually pretty proud of. I found my own way with a little help from freinds and I hope that the information and photos on here inspire you to do the same! :D


Enjoy guys!

-missmonster